Master Under Sink Water Filter Installation: Your Complete DIY Guide to Cleaner Water
Every day, millions of American families turn on their kitchen faucets expecting clean, safe water. Yet studies reveal that tap water in many areas contains chlorine, lead, and other contaminants that can affect both taste and health. If you're among the 73% of homeowners concerned about water quality, installing an under sink water filter might be your perfect solution.
This comprehensive guide walks you through under sink water filter installation from start to finish, whether you're a weekend DIY warrior or tackling your first plumbing project. You'll discover why millions of households choose this filtration method and how you can join them with confidence.
Why Under Sink Water Filters Are America's Smart Choice
The Hidden Problem in Your Tap Water
Your municipal water treatment removes many harmful bacteria, but it can't eliminate everything. Chlorine used for disinfection often remains, along with potential traces of lead from older pipes, pesticide runoff, and pharmaceutical residues. For families with young children or elderly members, these concerns become even more pressing.
Sarah, a mother of three from Denver, shared her experience: "I noticed my kids were constantly asking for juice instead of water. After installing our under sink system, they actually prefer drinking water now. It tastes completely different—clean and refreshing."
The Under Sink Advantage
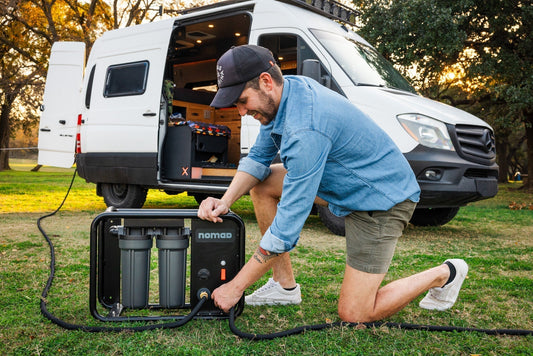
Unlike countertop filters that take up valuable space or pitcher systems requiring constant refills, under sink filters work invisibly. They connect directly to your cold water line, delivering filtered water through your existing faucet or a dedicated dispenser. Most quality systems filter 500-1000 gallons before needing replacement, making them incredibly cost-effective compared to bottled water.
Key Benefits:
- Continuous filtered water without storage limitations
- Space-saving design that keeps counters clear
- Superior filtration removing 99%+ of common contaminants
- Cost savings of $500+ annually versus bottled water
- Environmental impact reduction by eliminating plastic bottles

Image by freepik
Choosing Your Under Sink Water Filter System
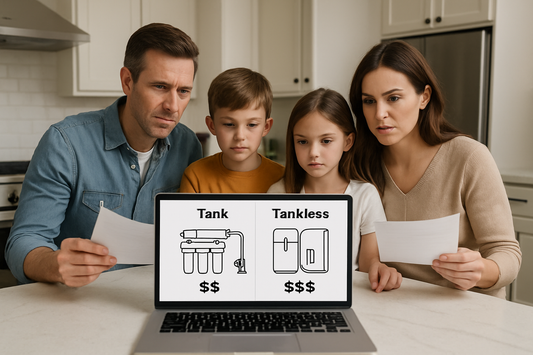
Before diving into water filter installation under sink, selecting the right system ensures optimal results. Consider these popular options:
Single-Stage Carbon Filters: Perfect for improving taste and removing chlorine, ideal for municipal water sources already meeting safety standards.
Multi-Stage Systems: Combining carbon filtration with additional media to remove heavy metals, bacteria, and chemical contaminants.
Reverse Osmosis Systems: The gold standard for comprehensive filtration, removing 99.9% of contaminants including dissolved solids.
For most families, a quality multi-stage system from Crystal Quest's whole house collection provides excellent balance between performance and value.
Essential Tools and Materials for Success
Your Installation Toolkit
Gathering the right tools before starting saves time and frustration:
- Adjustable wrench set (10" and 12" recommended)
- Screwdriver set (Phillips and flathead)
- Teflon tape (white thread seal tape)
- Pipe cutter or hacksaw (if modifications needed)
- Flashlight or headlamp (under-sink lighting is usually poor)
- Bucket and towels (for water spillage)
- Drill with bits (for mounting bracket)
What Comes With Your Filter System
Quality under sink filter kits include:
- Main filter housing and cartridge
- Mounting bracket and hardware
- Connection fittings and tubing
- Shut-off valve (if not present)
- Detailed installation instructions

Image by freepik
Step-by-Step Under Sink Water Filter Installation
Preparation Phase: Setting Yourself Up for Success
Step 1: Assess Your Space Clear everything from under your sink cabinet. Take photos of your current plumbing setup—this helps if you need to reference original connections later. Measure available space to ensure your chosen system fits comfortably.
Step 2: Locate Your Water Shut-Off Find the cold water shut-off valve under your sink. If you don't have individual valves, you may need to shut off water to your entire home. Test the valve to ensure it works properly before proceeding.
Step 3: Plan Your Installation Route Determine where you'll mount the filter housing. Most systems install on the cabinet's back wall or side panel. Ensure easy access for future filter changes.
The Installation Process: How to Install Under Sink Water Filter
Step 4: Shut Off Water and Drain Lines Turn off the cold water supply valve clockwise. Open your faucet to drain remaining water from the lines. Keep that bucket handy—there's always more water than expected.
Step 5: Mount the Filter Housing Using your drill, secure the mounting bracket to the cabinet wall. Ensure it's level and positioned for easy filter cartridge changes. Most homeowners find eye-level mounting ideal for maintenance access.
Step 6: Make Your First Connection Disconnect the cold water supply line from the faucet using your adjustable wrench. Water will drain out, so position your bucket accordingly. This connection point varies by sink type, but most use standard compression fittings.
Step 7: Install the Filter Inlet Connect the filter's inlet fitting to your cold water supply line. Wrap the threads with Teflon tape (3-4 wraps clockwise when viewing the threads) to ensure a watertight seal. Hand-tighten, then use your wrench to snug—avoid over-tightening, which can damage fittings.
Step 8: Complete the Output Connection Attach the filter's outlet line to your faucet connection. Again, use Teflon tape on threaded connections. This line carries your filtered water to the tap.
Step 9: System Activation and Testing With all connections secure, slowly turn the water supply back on. Listen for any unusual sounds—some gurgling is normal as air clears from the system. Check each connection point for leaks.
Initial System Flush and Optimization
Step 10: Flush Your New System Run cold water for 5-10 minutes to flush carbon particles and manufacturing residues. Initial water may appear cloudy or have a slight taste—this is completely normal and will clear within the first few gallons.
Step 11: Final Leak Check After running water, inspect all connections again. Tighten any fittings showing moisture. A drop or two during initial startup is normal, but ongoing drips require attention.
Troubleshooting Common Installation Challenges
When Things Don't Go as Planned
Low Water Pressure: Usually indicates a clogged pre-filter or air in the lines. Run water for several minutes to clear air bubbles.
Persistent Leaks: Check that all connections are properly tightened and that Teflon tape is applied correctly. Sometimes fittings need replacement if threads are damaged.
Strange Tastes or Odors: New filters often have a break-in period. Continue flushing until water tastes normal. If issues persist beyond a few days, contact the manufacturer.
Installation Space Issues: If your chosen system doesn't fit, consider compact alternatives or consult with a professional about custom mounting solutions.

Maximizing Your Investment: Maintenance and Care
Keeping Your System Running Perfectly
Monthly Inspections: Check for leaks, unusual sounds, or changes in water flow. Catching issues early prevents larger problems.
Filter Replacement Schedule: Most under sink filters need replacement every 6-12 months, depending on usage and water quality. Mark your calendar when you install—many families forget until water taste changes.
Performance Monitoring: Keep track of water flow rate and taste quality. Gradual changes often indicate it's time for maintenance.
When to Call a Professional
While install water filter under sink projects are well within most homeowners' capabilities, certain situations warrant professional help:
- Copper pipe modifications
- Electrical work for UV sterilizers
- Complex multi-stage systems
- Older homes with unusual plumbing configurations
The Long-Term Benefits: Why This Investment Pays Off
Health and Wellness Impact
Families report noticeable improvements in water taste and often increase their daily water intake. Children especially benefit from having appealing, safe water readily available. Many parents find their kids naturally choose water over sugary drinks when it tastes great.
Financial Savings
The average American family spends $600+ annually on bottled water. A quality under sink system pays for itself within 6-12 months while providing superior filtration. Over five years, savings often exceed $2,000.
Environmental Contribution
Each under sink filter cartridge replaces approximately 1,000 plastic bottles. Your single installation prevents hundreds of pounds of plastic waste annually while reducing your carbon footprint.
Advanced Considerations: Taking Your System Further
Upgrading Your Setup
As your needs evolve, consider adding:
- Remineralization filters to restore beneficial minerals
- UV sterilization for bacterial protection
- Dedicated filtered water dispensers for convenience
- Whole house pre-filtration to extend under sink filter life
Many homeowners start with basic systems and upgrade components over time. This approach spreads costs while allowing you to experience the benefits immediately.
Integration with Smart Home Technology
Modern systems offer smartphone connectivity, filter life monitoring, and automatic replacement reminders. While not essential, these features appeal to tech-savvy homeowners who want comprehensive home automation.
Your Next Steps: From Decision to Installation
Making Your Choice
Research shows that homeowners who successfully complete under sink installations share common traits: they prepare thoroughly, follow instructions carefully, and don't rush the process. Most report the installation taking 2-4 hours, with half that time spent on preparation.
Getting Started
Visit our under sink water filter collection to explore systems matching your needs and budget. Look for models with clear installation instructions, responsive customer support, and filter replacement availability.
Professional Support Available
Remember, you're not alone in this project. Most manufacturers offer installation support, and many local plumbers specialize in water filtration systems. Don't hesitate to ask questions—your investment in clean water deserves proper installation.
Conclusion: Your Path to Pure Water Starts Today
Installing an under sink water filter represents more than a home improvement project—it's an investment in your family's health, your budget, and the environment. While the initial installation requires some time and attention, the daily benefits of clean, great-tasting water make every effort worthwhile.
Whether you're motivated by health concerns, cost savings, or environmental responsibility, under sink water filter installation puts you in control of your water quality. Take that first step today, and join millions of families enjoying the peace of mind that comes with pure, filtered water straight from their kitchen tap.
Your future self will thank you for taking action now. Clean water isn't a luxury—it's a necessity you can provide for your family starting this weekend.