When clean water isn't guaranteed, knowing how to create your own filtration system becomes invaluable. Whether you're camping off-grid, facing an emergency, or simply want to reduce your reliance on expensive commercial filters, a DIY charcoal water filter offers a time-tested solution that costs pennies to build.
This natural water purification method has sustained civilizations for centuries. Today, we'll show you exactly how to harness charcoal's powerful filtration properties using materials you likely have at home.
Why Charcoal Works: The Science Made Simple
Charcoal isn't just burnt wood—it's nature's most effective water purifier. The secret lies in its microscopic structure. When organic material burns without oxygen, it creates countless tiny pores that act like magnets for contaminants.
These pores trap:
- Chlorine and chemical odors
- Heavy metals like lead and mercury
- Bacteria and parasites
- Sediment and particles
Key Fact: One gram of activated charcoal contains roughly 500 square meters of surface area—equivalent to two tennis courts packed into a space smaller than your fingernail.
Materials You Need (Under $5 Total Cost)
Essential Components:
- 2 plastic bottles (different sizes work best)
- Hardwood charcoal (avoid BBQ briquettes with chemicals)
- Pine needles or clean cloth
- Small nail or drill bit
- Hammer or drilling tool
Pro Tip: Source charcoal from extinguished campfires or purchase natural lump charcoal from hardware stores. Avoid anything labeled "self-lighting" or "quick-start."

Step-by-Step Construction Guide
Phase 1: Bottle Preparation
- Create the filter chamber: Take your larger bottle and carefully puncture 3-5 small holes in the cap using a nail
- Prepare the collection vessel: Remove the cap from your second bottle entirely—this catches your filtered water
- Test the flow rate: The holes should allow steady dripping, not streaming
Phase 2: Charcoal Processing
Safety First: Work in a well-ventilated area and wear a dust mask if available.
- Break charcoal into small pieces: Aim for pea-sized chunks using a hammer and sturdy surface
- Create charcoal powder: Grind some pieces into fine powder for maximum surface area
- Rinse briefly: Quick rinse removes loose dust that could cloud your water
Phase 3: Filter Assembly
Layer from bottom to top in your filter bottle:
- Pine needles or cloth (prevents charcoal from escaping)
- Coarse charcoal pieces (2-3 inches)
- Fine charcoal powder (1 inch)
- Another pine needle layer (top barrier)
Critical Detail: Pack layers firmly but not too tight—water needs to flow through.
The Filtration Process: What to Expect
First Pass Results: Your initial filtered water will appear grayish-black. This is normal and indicates the charcoal is working.
Timeline Breakdown:
- Minutes 1-30: Water flows dark with charcoal particles
- Hours 1-2: Color lightens as particles settle
- Hours 2-4: Water runs clear with subtle pine aroma
Performance Indicator: Clear water with no visible particles signals successful filtration. The subtle pine scent is normal and actually pleasant.

Maximizing Your Filter's Effectiveness
Maintenance Schedule
Daily Use: Rinse with clean water every 3-4 filtrations Weekly: Replace pine needles if they appear clogged Monthly: Refresh charcoal layers for optimal performance
Troubleshooting Common Issues
Slow Flow Rate: Remove some charcoal or enlarge holes slightly Strong Pine Taste: Reduce pine needle quantity by half Cloudy Results: Add more fine charcoal powder layer
When NOT to Use This Method
Important Limitations: This DIY filter removes many contaminants but cannot eliminate all waterborne pathogens. For drinking water safety:
- Boil filtered water if source is questionable
- Use commercial filters for guaranteed pathogen removal
- Test water quality when possible
Best Applications: Emergency situations, improving taste of treated water, off-grid living solutions, and educational projects.
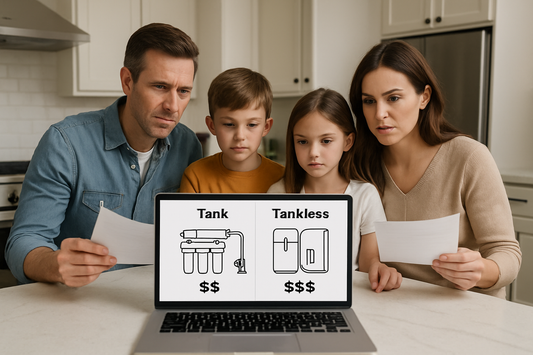
Cost Comparison: DIY vs Commercial Options
| Solution Type | Initial Cost | Replacement Cost | Gallons Filtered |
|---|---|---|---|
| DIY Charcoal | $3-5 | $1-2 | 50-100 |
| Basic Pitcher | $25-40 | $8-15 | 40-60 |
| Under-Sink | $100-300 | $20-50 | 500-1000 |
Value Insight: While commercial systems offer convenience and certified pathogen removal, DIY charcoal filters provide excellent backup filtration at a fraction of the cost.
For comprehensive water treatment solutions, explore our water filtration collection featuring systems designed for various budgets and needs.

Advanced Tips for Better Results
Charcoal Selection: Hardwoods like oak, maple, or hickory produce superior filtration compared to softwoods Pre-Filtration: Remove large debris with cloth before using your charcoal filter Storage: Keep unused charcoal in sealed containers to maintain effectiveness
Frequently Asked Questions
How often should I replace the charcoal in my filter? Replace charcoal after filtering approximately 50-100 gallons, or when water flow significantly slows. Visual cues include persistent cloudiness or reduced taste improvement.
Can this filter make any water source safe to drink? This filter improves water quality but doesn't guarantee pathogen removal. Always boil questionable water sources or use certified purification methods for complete safety.
Why does my filtered water taste like pine? The pine needle layer adds natural antimicrobial properties and a subtle flavor. Reduce pine needles if the taste is too strong, or rinse them thoroughly before use.
What's the difference between my DIY filter and store-bought versions? Commercial filters often include multiple filtration stages and certified pathogen removal. DIY charcoal filters excel at removing chemicals, odors, and sediment but require additional treatment for complete purification.
Final Thoughts: Empowering Water Independence
Creating your own charcoal water filter represents more than just a money-saving hack—it's a step toward water independence and emergency preparedness. This ancient purification method proves that effective solutions don't always require expensive technology.
Remember: While this DIY approach handles many common water issues, it's best used alongside other water safety practices. When in doubt, combine filtration with boiling or chemical treatment for complete peace of mind.
Your homemade filter will serve you well in camping situations, emergencies, or whenever you want chemical-free water improvement on a budget. Master this skill once, and you'll have lifetime access to cleaner, better-tasting water wherever life takes you.