Why Every RV Needs a Portable Water Softener
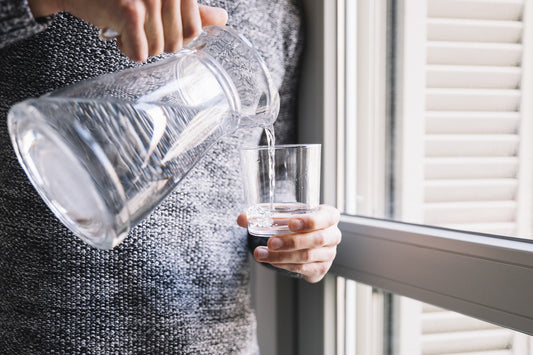
Picture this: You've just parked your RV at a stunning campground after hours of driving. You turn on the tap for a refreshing drink, only to taste that familiar metallic, mineral-heavy water that makes you cringe. Your morning coffee tastes off, your skin feels dry after showering, and you notice white spots forming on your dishes already.
This scenario plays out thousands of times daily across America's campgrounds. The reality? Most RV parks and campgrounds have notoriously hard water that can turn your dream vacation into a series of small frustrations.
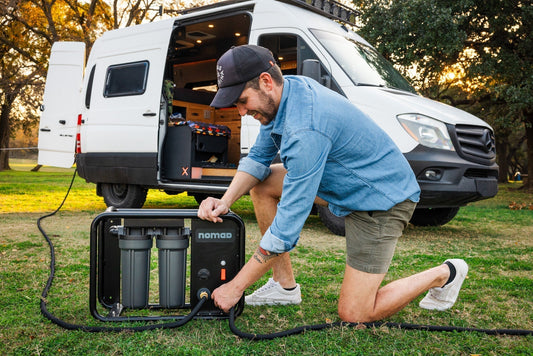
That's where an RV portable water softener becomes your traveling companion's best friend. Unlike being stuck with whatever water quality fate deals you, a portable system gives you the freedom to enjoy consistently soft, great-tasting water wherever your adventures take you.
Understanding Hard Water's Impact on RV Life
The Hidden Costs of Hard Water on the Road
Hard water isn't just about taste—it's literally costing you money with every mile you travel. When mineral-rich water flows through your RV's plumbing system, it leaves behind calcium and magnesium deposits that gradually choke your pipes, clog your fixtures, and reduce the efficiency of your water heater.
Consider Sarah and Mike, full-time RVers who learned this lesson the hard way. After two years of ignoring water quality, they faced a $3,000 repair bill when their water heater failed prematurely and their shower head became completely blocked. "We thought we were saving money by skipping the water softener," Sarah recalls. "It ended up being the most expensive 'savings' we ever made."

What Makes Water "Hard" in Different Regions
As you travel across the country, you'll encounter dramatically different water conditions. The Southwest is notorious for extremely hard water, with some areas exceeding 300 parts per million (ppm) of dissolved minerals. The Great Lakes region offers generally softer water, while parts of Texas and Arizona can deliver water so hard it feels almost gritty.
Understanding these regional differences helps you prepare for what's ahead. Your off grid water softener system becomes especially crucial when you're boondocking in areas known for challenging water conditions.
Types of RV Water Softening Solutions
Portable Water Softeners: Freedom in a Compact Package
The beauty of RV water softener portable units lies in their versatility. These systems typically weigh between 20-40 pounds when empty, making them manageable for most RV owners to set up and store. Unlike fixed installations, portable units can be easily disconnected when you're moving or when you encounter campgrounds with already-soft water.
Most portable softeners use the same ion-exchange technology as home units but in a compact, travel-friendly package. They work by exchanging hard water minerals (calcium and magnesium) for sodium ions, effectively "softening" your water supply.
Mobile Home Water Softener vs. RV-Specific Units
While mobile home water softeners might seem like an option, they're typically designed for permanent installation and lack the portability features essential for RV life. RV-specific units feature:
- Compact, lightweight design
- Quick-connect fittings
- Durable construction for road vibrations
- Easy-to-follow setup instructions
Setting Up Your Portable Water Softener
Pre-Installation Considerations
Before you even think about connecting your camper water softener, take time to assess your typical water usage patterns. A family of four using an RV for weekend trips has vastly different needs than a retired couple living full-time on the road.
Test your water hardness regularly using simple test strips available at most camping supply stores. This helps you understand when regeneration is needed and allows you to adjust your softener's settings accordingly.
Step-by-Step Installation Process
Step 1: Choose Your Location Find a level spot near your RV's water connection where you can easily access the unit for maintenance. Ensure there's adequate drainage for the regeneration cycle.
Step 2: Connect the System Most portable softeners feature standard RV hose connections. Connect the inlet to your water source (campground spigot or fresh water tank pump) and the outlet to your RV's water inlet.
Step 3: Initial Setup Fill the brine tank with water softener salt (never use table salt), and run the initial regeneration cycle according to your unit's instructions.
Step 4: System Testing After setup, test your water using hardness test strips to confirm the system is working effectively.

Maintenance Made Simple for Road Warriors
Daily and Weekly Care
Maintaining your portable water softener doesn't require an engineering degree. Daily tasks include monitoring water pressure and checking for leaks. Weekly maintenance involves testing water hardness and checking salt levels.
The key is developing a routine that becomes second nature. Many RV owners check their softener when they're doing their regular RV walk-around inspection—it takes less than five minutes and prevents bigger problems down the road.
Regeneration Cycles: When and How
Understanding regeneration cycles is crucial for optimal performance. Most portable units need regeneration every 3-7 days, depending on water hardness and usage. Modern units often feature automatic regeneration timers, but manual control gives you flexibility when water conditions vary dramatically.
Pro tip: Schedule regeneration for overnight when water usage is minimal. The cycle typically takes 2-3 hours, and you'll wake up to fresh, soft water.
Troubleshooting Common Issues on the Road
Salt Bridging and Clogs
Salt bridging occurs when humidity causes salt to form a hard crust in your brine tank. This is particularly common in humid climates or during extended periods of storage. Break up bridges with a long-handled spoon and consider using iron-out salt in problematic areas.
Pressure Issues
Low water pressure often indicates a clogged pre-filter or resin bed issues. Most problems can be resolved with a simple backwash cycle, but persistent issues might require professional service.
System Not Softening
If your water still feels hard after treatment, check salt levels first, then verify that the regeneration cycle is completing properly. Sometimes the issue is as simple as incorrect timer settings.
Regional Considerations for RV Water Softening
Southwest Adventures
The Southwest presents unique challenges with extremely hard water and high mineral content. Consider using a pre-filter to remove sediment before it reaches your softener, and be prepared for more frequent regeneration cycles.
Great Lakes Region
Generally softer water in this region means your softener works less hard, but don't let that lull you into complacency. Some areas still have moderate hardness that benefits from treatment.
Mountain Regions
High-altitude camping often means well water with unpredictable mineral content. Your portable softener provides consistency when water quality varies dramatically from campground to campground.
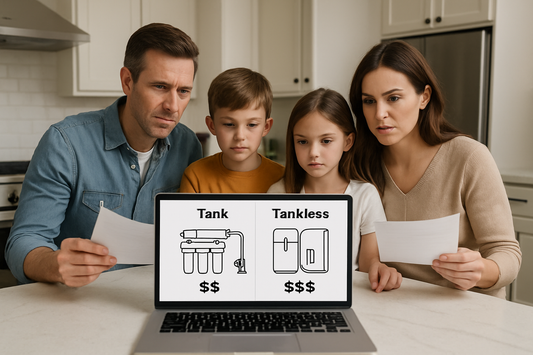
Cost-Benefit Analysis: Is It Worth It?
Initial Investment vs. Long-Term Savings
A quality RV portable water softener typically costs $200-$600, while repairs from hard water damage can easily exceed $2,000. Factor in improved appliance longevity, better-tasting water, and enhanced comfort, and the investment pays for itself within the first year of regular use.
Operational Costs
Monthly salt costs range from $5-15, depending on usage and water hardness. Compare this to the cost of bottled water for drinking and cooking, plus potential repair bills, and the economics become clear.
Advanced Features in Modern Portable Softeners
Smart Technology Integration
Today's portable softeners often include digital displays showing remaining capacity, salt levels, and regeneration schedules. Some units even connect to smartphone apps for remote monitoring and control.
Eco-Friendly Options
Look for units with high-efficiency features that minimize water waste during regeneration. Some models use 75% less salt than older designs while maintaining excellent performance.

Choosing the Right Size for Your Adventures
Capacity Considerations
Match your softener's capacity to your travel style. Weekend warriors might need only a 16,000-grain unit, while full-timers should consider 24,000-grain or larger systems.
Physical Constraints
Consider storage space when your RV is in motion. Some units feature compact designs that fit in standard RV storage bays, while others require external mounting or towing.
Seasonal Storage and Winterization
Preparing for Off-Season
Proper winterization prevents freeze damage and extends system life. This involves draining all water, adding RV antifreeze to prevent residual water from freezing, and storing in a climate-controlled environment when possible.
Spring Startup
Spring startup requires flushing the system, refilling with fresh salt, and running several regeneration cycles to ensure optimal performance for the new season.
Frequently Asked Questions
How often should I regenerate my RV water softener?
Regeneration frequency depends on water hardness and usage. Most RV owners regenerate every 3-7 days, but test your water regularly to determine the optimal schedule for your specific conditions.
Can I use regular table salt in my portable water softener?
Never use table salt in your water softener. Only use salt specifically designed for water softeners, as table salt contains additives that can damage the resin bed and reduce system efficiency.
How do I know if my water softener is working properly?
Test your water regularly with hardness test strips. Properly functioning softeners should reduce hardness to less than 3 grains per gallon. Also watch for the return of hard water symptoms like soap scum and mineral deposits.
What's the difference between water softening and water filtering?
Water softeners remove minerals that cause hardness, while filters remove contaminants, sediment, and improve taste. Many RVers use both systems in combination for comprehensive water treatment.
How much water does regeneration use?
Most portable softeners use 20-50 gallons during regeneration, depending on size and settings. Plan accordingly when boondocking or in areas with limited water access.
Your Next Adventure Awaits
The freedom of the open road shouldn't come with the compromise of poor water quality. Whether you're planning a weekend getaway to the mountains or embarking on a cross-country adventure, an RV portable water softener ensures that home-quality water follows you wherever you roam.
From protecting your RV's plumbing system to ensuring that perfect morning coffee tastes just right, a portable water softener transforms your travel experience. The investment in water quality is an investment in comfort, health, and the longevity of your rolling home.
Don't let hard water hold back your adventures. With the right portable softening system, every destination becomes a place where you can truly feel at home, one soft, refreshing glass of water at a time.